

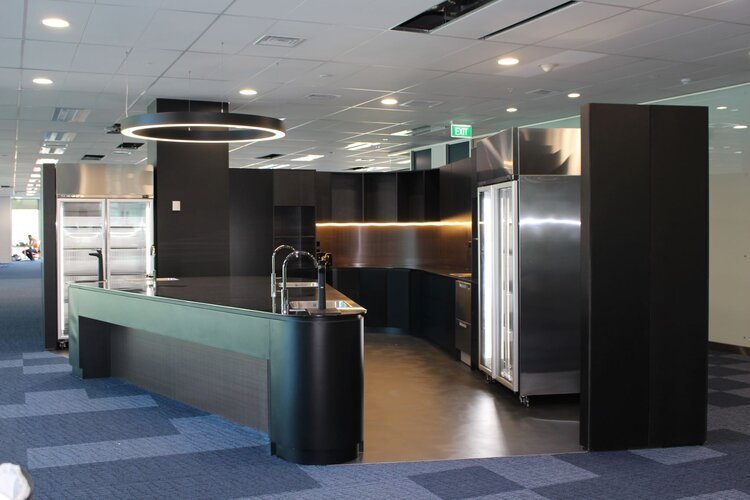
A high-end kitchen installation is ultimately a game of millimetres where a single degree of error can compromise an entire renovation. While it’s easy to get caught up in choosing the perfect stone or cabinetry finish, the true success of your kitchen joinery installation depends on the invisible precision of the fit. You’ve likely felt the frustration of a door that won’t stay shut or seen the subtle, heart-sinking gap between a benchtop and a wall that wasn’t quite square.
We understand that you want a space that doesn’t just look bespoke on day one but functions perfectly for decades. This guide explores the critical precision points that separate a DIY disaster from a professional result. By identifying the common pitfalls of levelling and alignment, you can protect your investment and avoid the steep costs of remedial work later. We’ll walk through the technical standards and structural checks required to ensure your new kitchen remains a source of pride rather than a series of expensive fixes.
Key Takeaways
- Learn why absolute vertical and horizontal alignment is non-negotiable for a stable kitchen, especially when dealing with the uneven floors common in New Zealand homes.
- Discover how the “box-to-box” fixing method creates a unified structure that prevents cabinetry from shifting or sagging over time.
- Understand the importance of scribing to achieve a seamless, bespoke fit against irregular walls without relying on low-quality fillers.
- See why hiring a specialist for your kitchen joinery installation ensures a “right-the-first-time” result through the use of trade-specific tools and high-volume expertise.
- Identify the role of functional hardware adjustments in the final handover to ensure every door and runner operates with perfect precision.
The Foundation of Kitchen Joinery: Why Leveling is Non-Negotiable
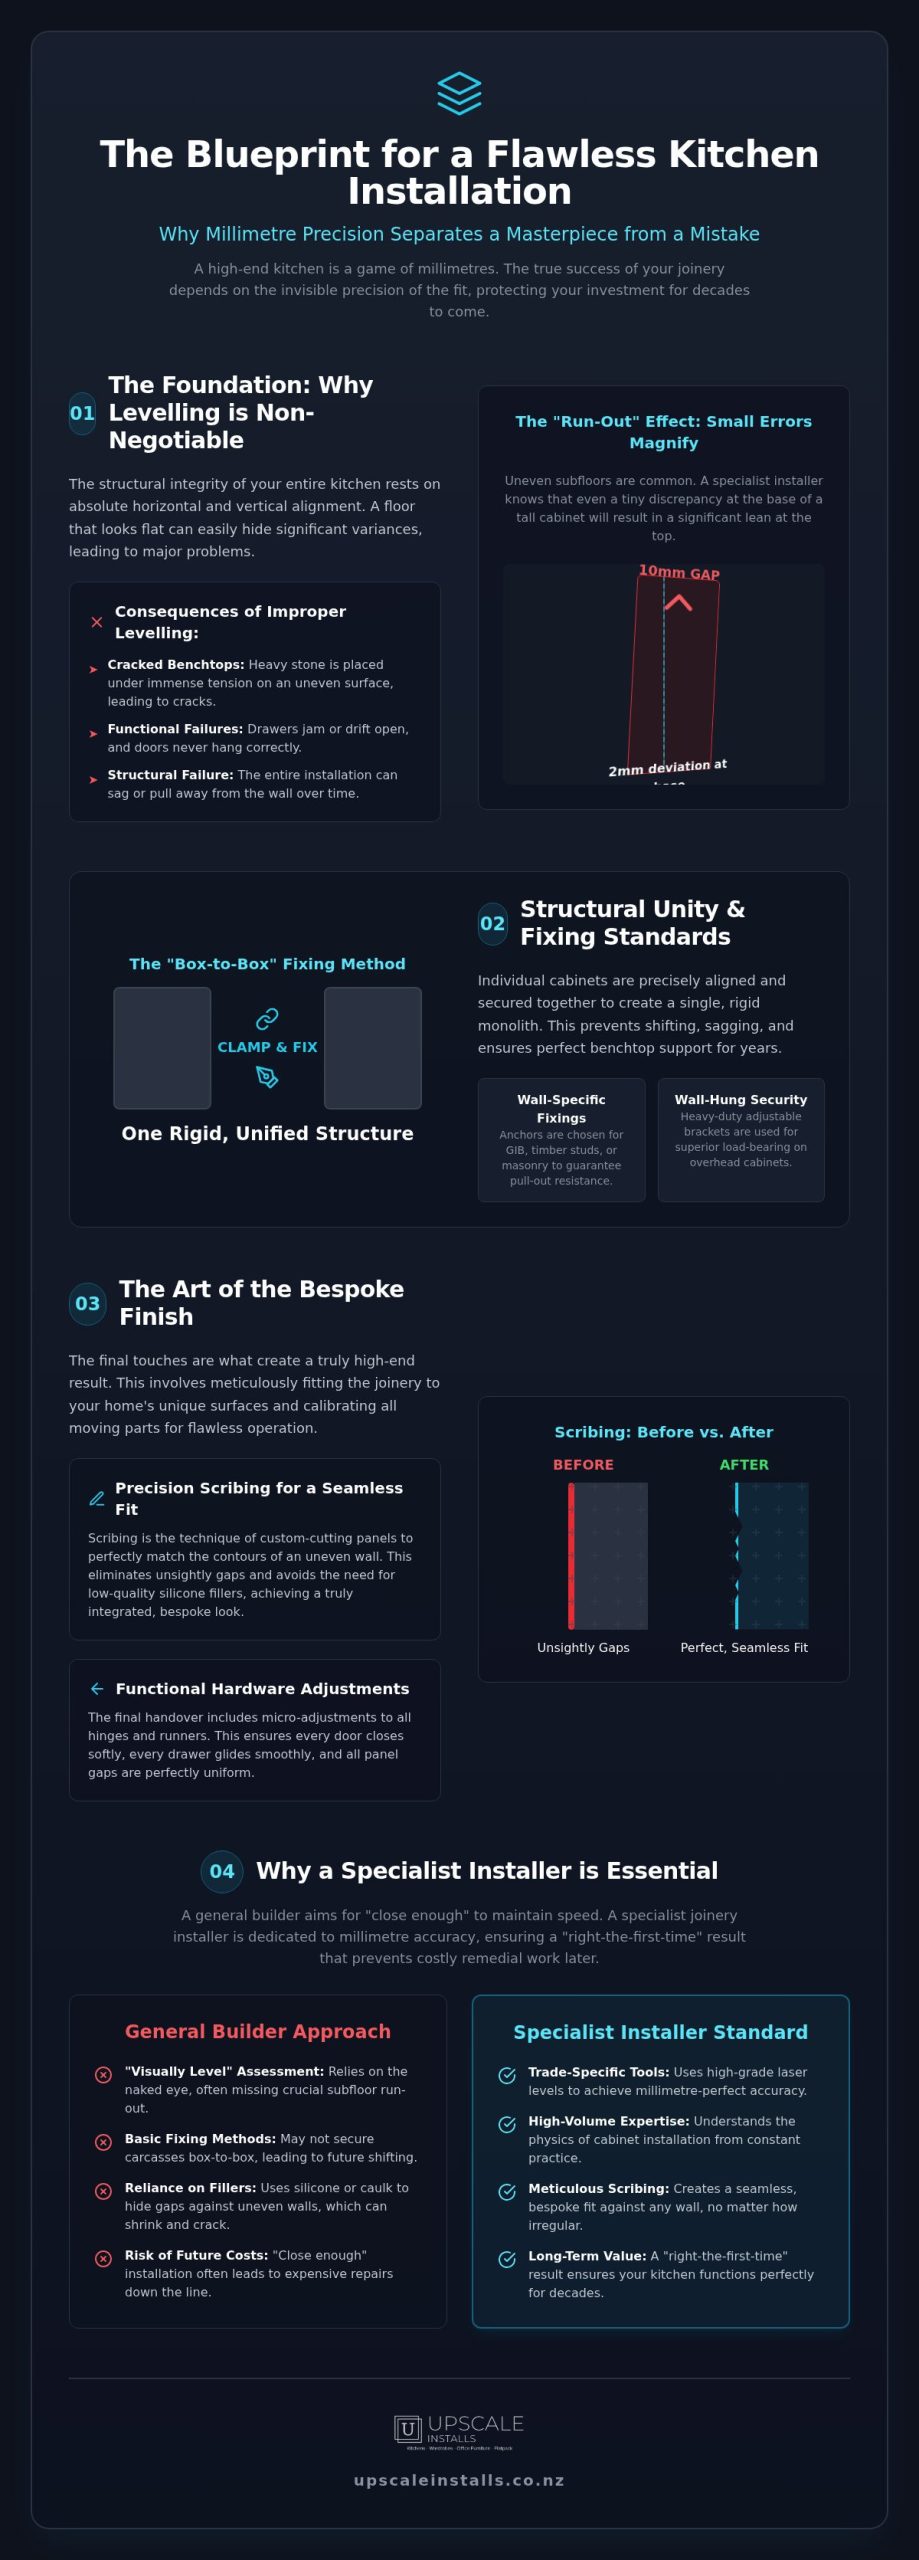
Precision in a kitchen joinery installation begins at the floor. While many homeowners focus on the aesthetic of the doors, the structural integrity of the entire project rests on absolute horizontal and vertical alignment. This level of accuracy is rarely found in the average home, particularly in older New Zealand villas where subfloors have settled and shifted over decades. A floor that looks flat to the naked eye can often have a variance of ten millimetres or more across a three-metre run.
When carcasses aren’t perfectly level, the consequences are both functional and financial. A heavy engineered stone or granite benchtop requires a perfectly flat plane for support. If there’s even a minor dip or peak across the cabinet run, the stone is placed under immense tension. This eventually leads to visible cracks or total structural failure. Inside the cabinets, drawers may jam or drift open, and doors will never hang quite right. Professional installers rely on high-grade laser levels and adjustable plinth feet to achieve millimetre accuracy, ensuring the Kitchen cabinet construction is supported exactly as designed.
The Plinth and Kickboard Setup
The kickboard is the anchor for your entire kitchen. It isn’t merely a cosmetic strip; it’s the foundation that transfers the weight of the cabinetry and benchtops to the floor. We ensure proper weight distribution to avoid the “floating cabinet” look, where cabinets appear to sag or pull away from the wall. Additionally, a professional installation includes moisture protection for the plinth. Using water-resistant materials or specific seals prevents the cabinetry from absorbing moisture from floor cleaning or accidental spills, which would otherwise cause the board to swell and fail over time.
Dealing with Uneven Subfloors
Specialists often encounter floor “run-out,” where a floor might slope significantly across the length of a kitchen island. A general builder might settle for “close enough” to maintain speed, but a specialist knows that being two millimetres out at the base can result in a ten-millimetre lean at the top of a tall pantry. We use methodical levelling techniques to compensate for these variances. By identifying the highest point of the floor first, we can adjust the rest of the run to match. This creates a true level finish that provides peace of mind and ensures the structural integrity of the kitchen joinery installation for decades.
Structural Carcass Alignment and Fixing Standards
Once the floor is established as a level baseline, the focus shifts to the structural unity of the cabinetry. A high-quality kitchen joinery installation relies on the “box-to-box” fixing method. This process involves precisely aligning adjacent carcasses and securing them together to create a single, rigid monolith. Without this unified structure, individual cabinets can shift independently under the weight of daily use, leading to misaligned doors and compromised benchtop support. We ensure that every cabinet is clamped and screwed through the side walls, effectively turning separate units into a cohesive architectural element.
The choice of fixings is critical and must be dictated by the specific wall substrate found in New Zealand homes. Securing cabinetry to GIB requires different anchors than fixing directly into timber studs or masonry. We select fasteners based on their shear strength and pull-out resistance to handle the significant load of modern benchtops. Engineered stone, for instance, is exceptionally heavy. If the carcasses aren’t properly secured to the wall and to each other, the weight can cause the joinery to pull away or “rack” out of square. A common mistake during this phase is over-tightening fixings. Applying too much torque can bow the carcass sides, making it impossible to align drawers or hinges correctly later in the project.
Wall-Hung Cabinetry Security
Overhead units present a unique set of structural challenges. The physics of a wall-hung cabinet involves constant downward and outward tension, especially when loaded with heavy dinnerware. We prefer using heavy-duty adjustable hanging brackets rather than simply driving screws through the back panel. These brackets offer superior load-bearing capacity and allow for fine-tuned adjustments to ensure the units sit perfectly level. Before hanging, we always check for plumb walls. If a wall leans, we shim the cabinetry to ensure the boxes remain square, preventing unsightly gaps that collect dust and ruin the finish.
Void and Pipework Management
Successful installation requires seamless coordination with other trades. We plan for “sparkies” and plumbers by creating dedicated service voids behind the cabinetry. A frequent error in lower-quality fits is cutting large, jagged holes in the back of carcasses to accommodate pipes or cables. This doesn’t just look unprofessional; it weakens the cabinet’s structural integrity. We use precise hole saws and maintain the smallest possible entry points to keep the structure strong while allowing for essential appliance ventilation. If you are planning a renovation, our team can provide specialist installation services that prioritise these structural details from the outset.
The Art of Scribing: Achieving a Bespoke Finish
A successful kitchen joinery installation is ultimately judged by the quality of its finish. In New Zealand, where older villas and even modern builds rarely feature perfectly plumb walls, “scribing” becomes an essential skill. Scribing is the process of custom-cutting panels to mirror the specific irregularities of a wall or ceiling. This technique ensures that the cabinetry sits flush against the surface, eliminating the uneven gaps that occur when straight joinery meets a wonky wall. Scribing is the definitive hallmark of a professional joiner.
While many budget installers rely on standard off-the-shelf fillers, these often look like an afterthought. They are typically flat strips that leave visible gaps at either end, which eventually fail as the house settles. In contrast, a scribed panel provides a seamless transition that makes the kitchen look like it was built into the architecture of the room rather than merely placed inside it. This level of detail has a profound visual impact, creating the clean, continuous lines that define a high-end renovation. It transforms a standard set of cabinets into a bespoke feature that feels permanent and intentional. Before your project begins, reviewing a comprehensive residential kitchen fitting checklist can help you identify the precise benchmarks and professional standards you should expect at every stage.
Managing Gaps and Fillers
There are times when a filler piece is necessary, such as allowing for door clearance against a wall. The difference lies in the execution. A professional makes the filler look intentional by using the same material and finish as the cabinet doors. We avoid the common mistake of using thick beads of silicone to hide large gaps; while silicone is a useful sealant, it shouldn’t be used to compensate for poor joinery. Every visible edge must be colour-matched and precisely fitted to maintain the aesthetic. This “right-the-first-time” approach ensures the kitchen joinery installation remains stable and attractive for decades without the need for remedial adjustments.
Bulkheads and Ceiling Joins
The area between the top of the pantry and the ceiling is a frequent site for installation errors. Leaving an open gap creates a massive dust trap that is nearly impossible to clean, which quickly compromises kitchen hygiene. We provide solutions such as creating a shadow line for a modern, architectural look or a flush bulkhead finish for a classic, integrated feel. Precision here is vital. A perfectly executed ceiling join prevents the cabinetry from looking “top-heavy” and ensures the lines of the kitchen remain sharp. This meticulous attention to the top of the joinery is just as important as the foundation, as it completes the visual envelope of the room.
Functional Hardware: Hinges, Runners, and Adjustments
The final phase of a kitchen joinery installation is often the most time-consuming because it requires a meticulous eye for detail. While the structural work provides the skeleton, the hardware provides the functionality. A kitchen isn’t truly finished until every door and drawer front is perfectly aligned with its neighbours. We treat the final adjustment phase as a critical handover step, ensuring that the “hand-feel” of the kitchen matches its visual quality. If you want to ensure your cabinetry is fitted with this level of precision, you can book our professional kitchen installation team to manage your project from start to finish.
High-quality 3-way adjustable hinges, such as those from Blum, are indispensable for a professional result. These components allow for precise 3D calibration, ensuring that even if a wall has shifted slightly, the doors can be brought back into perfect alignment. A common mistake we see in DIY or rushed builds is the neglect of soft-close tension settings. If these aren’t balanced, you end up with doors that either slam shut or fail to close completely. Similarly, drawer runners must be installed with absolute parallel precision. If they are even a fraction of a millimetre off, the drawers will “drift” open on their own or feel unnecessarily heavy to operate.
Door Alignment Checklist
Achieving a high-end look requires a methodical approach to door alignment. We work through a 3D adjustment process that covers horizontal, vertical, and depth positioning. This ensures that the “reveals” (the small gaps between doors and drawers) are consistent across the entire kitchen. A variance of even one millimetre is visible to the naked eye and can make a bespoke kitchen look poorly made. We test every drawer runner for smooth, silent operation, ensuring the soft-close mechanism engages correctly without resistance or noise.
Handle and Hardware Placement
Handle drilling is a high-stakes task because there’s no “undo” button once a hole is bored into a finished cabinet face. We use specialised jigs to ensure that every handle is positioned with absolute consistency across every drawer and door. Beyond just visual alignment, we consider the ergonomics of the space. The height and centring of handles must be checked against the user’s needs to ensure the kitchen is comfortable to navigate. This level of precision prevents the “staggered” look often seen when handles are installed by eye rather than by measurement. It’s these final touches that confirm the structural integrity and aesthetic value of the kitchen joinery installation.
Why a Specialist Joinery Installer Beats a General Builder
The success of a high-end kitchen isn’t just about the materials used; it’s about the hands that fit them. While a general builder is essential for structural changes and site management, a kitchen joinery installation requires a level of specialisation that goes beyond general construction. A specialist installer brings a set of trade-specific tools, including precision track saws, high-accuracy laser levels, and dedicated scribing equipment, which aren’t typically found in a standard builder’s kit. These tools allow for the millimetre-perfect adjustments that prevent the functional failures discussed earlier in this guide.
Experience is the other critical differentiator. A dedicated specialist might install more kitchens in a single month than a general builder handles in an entire year. This volume of work means we’ve encountered every possible challenge, from the wonkiest floors in older, character properties to the complex integrated appliance requirements of modern luxury apartments. We don’t just follow a plan; we anticipate the “domino effect” of small errors before they become costly problems. If you’ve had a poor experience with a previous contractor, our remedial expertise allows us to step in and correct sub-standard work, restoring both the function and the value of your cabinetry.
National Reach, Local Craftsmanship
Upscale Installs is a 100% Kiwi-owned and operated business, which means we have a personal investment in the quality of every project we touch. We understand New Zealand building standards and the unique environmental factors that can affect timber and stone in our climate. By choosing a national specialist with a local focus, you get the benefit of established, professional systems combined with the accountability of a master craftsman. This supports our local trade economy while ensuring you receive a consistent, high-quality result regardless of your location.
The Upscale Process
Our approach is built on a seamless end-to-end service that removes the stress from the kitchen joinery installation process. We manage everything from the initial manufacturing of bespoke solutions to the final 3D adjustment of every hinge and drawer runner. Our in-house interior design and remedial services add extra value, providing a holistic solution that a generalist simply cannot match. This “right-the-first-time” mentality gives you the peace of mind that your kitchen will remain stable and beautiful for decades. To get started on your project, Enquire about your kitchen installation with Upscale Installs today.
Securing Your Investment with Professional Precision
A successful kitchen renovation is defined by the invisible details that ensure long-term stability and effortless function. From the foundational accuracy of millimetre-perfect levelling to the bespoke finish of a perfectly scribed panel, every step of the process protects your home from future structural issues. By prioritising structural carcass alignment and the fine-tuning of functional hardware, you ensure that your kitchen joinery installation remains as precise in ten years as it is on the day of handover.
Upscale Installs is a 100% Kiwi-owned and operated specialist, providing reliable expertise for both residential and commercial fit-outs across New Zealand. Whether you’re starting a new project or require expert remedial and adjustment services to fix a previous installer’s mistakes, we offer the accountability and craftsmanship your home deserves. We don’t just fit cabinets; we provide a durable solution that stands the test of time and adds genuine value to your property.
Ready to ensure your cabinetry is fitted to the highest trade standards? Get a Professional Quote for Your Kitchen Installation and take the first step towards a kitchen that functions perfectly for decades. We look forward to helping you achieve a result you can be proud of.
Frequently Asked Questions
How long does a professional kitchen joinery installation usually take?
A professional cabinetry fit-out typically takes between two and five days, depending on the scale and complexity of the design. While the cabinetry itself is installed relatively quickly, the total kitchen renovation usually spans about two weeks to allow for benchtop templating, manufacturing, and final trade connections. This timeline ensures every carcass is perfectly levelled and secured before the heavy stone surfaces arrive.
Can I install my own flatpack kitchen, or should I hire a pro?
While homeowners can technically install their own flatpack units, hiring a professional for your kitchen joinery installation ensures a level of precision that DIY projects often lack. Professionals use specialised tools like laser levels and track saws to handle uneven floors and wonky walls. A professional fit prevents common issues like cracked benchtops or drifting drawers that frequently plague self-installed kitchens.
What is the difference between a kitchen installer and a cabinet maker?
A cabinet maker focuses on the manufacturing and construction of the units in a controlled workshop environment. A kitchen installer, however, is a specialist in the site-specific fitting, levelling, and finishing of that joinery. At Upscale Installs, we bridge this gap by offering both manufacturing and expert installation, ensuring the high standards set in the factory are maintained in your home.
Do kitchen installers also do the plumbing and electrical work?
Kitchen installers do not perform electrical or plumbing work. In New Zealand, these tasks must be completed by registered, licensed tradespeople to meet legal safety standards and building regulations. We coordinate with your “sparkies” and plumbers by providing accessible service voids and precise entry points, ensuring all connections are safe and compliant without compromising the cabinetry’s structural integrity.
Why are my kitchen cabinet doors not level after installation?
Misaligned doors are usually the result of carcasses that weren’t levelled correctly at the start or hinges that require final 3D calibration. Even a millimetre of lean at the base of a cabinet is magnified at the top. Professional installers use high-quality 3-way adjustable hinges to fine-tune these reveals, ensuring every door sits flush and operates smoothly even if the house has settled slightly.
What should I do if my walls are not straight for my new kitchen?
If your walls aren’t plumb, the professional solution is to scribe the cabinetry panels to match the wall’s specific irregularities. This involves custom-cutting the timber or board to mirror the curve or lean of the wall. Using silicone or standard filler strips to hide large gaps looks unprofessional; scribing ensures a seamless, bespoke finish that makes the kitchen look built-in rather than just bolted-on.
How much does it cost to have a kitchen professionally installed in NZ?
The cost of a professional kitchen joinery installation in New Zealand depends on factors like the number of cabinets, the complexity of the layout, and whether remedial work is required. Since every site is different, especially in older homes, we provide custom quotes based on your specific requirements. Investing in professional labour upfront prevents the significant remedial costs associated with fixing a poor-quality DIY fit later.
Does Upscale Installs provide remedial work for poorly fitted kitchens?
Yes, we offer expert remedial and adjustment services for kitchens that have been poorly fitted by previous contractors. Our team can often salvage a failing installation by realigning carcasses, securing loose cabinetry, and recalibrating hardware. This service provides peace of mind for homeowners who have discovered functional or structural issues after their initial renovation was completed.

Leave a Reply